If you do not already have a regular heavy base pan and planning to buy one, consider buying a pressure cooker instead. All pressure cookers are usually made of heavy metal base as they work on a steam system. You can use the bottom part of the cooker as a pan without the cover when you are not pressure cooking. Pressure cooker of the right shape and size can serve both purposes, pan and as well a pressure cooker. Do your bit to save this planet. You save 70% fuel energy and your time and energy by using a pressure cooker.
How am I contributing to making this earth green by following four steps or less recipe?
Save fuel energy by covering the pan all the time while milk is reaching the boiling point. This will quicken the process and save energy.
Consider using the residue water after cheese is made, you can use it in some other recipe or make dough for cookies, bread or muffins.
You save: 10-40% of fuel energy by covering the pan and 2-3 minutes of your time
INGREDIENTS:
1 litre full cream milk
1/2 tablespoon of lemon/lime juice or vinegar
STEP 1: Pour milk into pan and bring it close to boiling point. Continue stirring the milk so that it does not stick to the bottom.
STEP 2: Add 10-12 drops of lemon juice. Milk will start to curdle as lemon juice is put in, keep the heat on until milk curdles completely and becomes watery and transparent.
STEP 3: Pour this into a muslin cloth over a sieve and either hang the cheese or press it with heavy weight for an hour for it to form shape.
HANDY TIPS:
For the cheese to get solid you can chose to hang it for the water to drain out. This is good if you want to grate or crumble the cheese when it is ready. However if you want it in a block to cut it into square or any other shaped pieces you can put it on a cutting board pressed by another heavy flat object or a heavy cutting board.
You can add any herb or spices of your choice like dill, rosemary, cilantro, red chilli flakes, garlic or black pepper to make flavoured cheese. Be as creative as you want to be.
Here is a tip to get the quick cooking going and to save time on the days you are really pressed for it and yet want to make something nice and elaborate. Most sumptuous indian curries and dishes require sautéed onion and this is what takes time. So, be smart and keep some chopped sautéed onions in your refrigerator. The day you are making a recipe with onions, plan on peeling and chopping some extra onions to save them for the next time. You can also do this on a weekend or at a time when you are anyway in the kitchen cooking something else and have your hands free in between to peel the onions and drop them in a chopper. Sauté all onions together for your current recipe as well as for the next one. Save sautéed onion in small freezer bags/containers for the next time for quick use. This has been a trick that has saved me time on many occasions. For some my upcoming recipes I will be using ready sautéed onions from my fridge. It’s all about saving time, the most precious thing..efficient use of time in the kitchen this time around will save some time for the next time you are in the kitchen.
STEP 1. Put hing (Asafoetida powder), methi seeds (Fenugreek seeds) and jeera (Cumin seeds) into heated oil, sauté for 20-30 seconds.
STEP 2. Throw in the cut pieces of squash/pumpkin, sugar, salt, red chilli powder and ¾ cup of water.
STEP 3. Cover the pan and let everything cook until squash turns soft and turns a little dark in colour.
STEP 4. Add garam masala and serve with coriander leaves garnish
HANDY TIP:
Asafoetida has a very unique flavour, the recipe will still come out fine, even if you decide not to use it.
You do not have to take the skin off for most sitaphal/petha (in India)(squash/pumpkin in North America) for this recipe, however if you have already used a particular kind of pumpkin that is known for coarse skin, you may remove the skin.
By using this recipe you save: 50% of fuel energy and 15 minutes of your precious time that is about 5 to 8% of the total time you spend in kitchen on an average (assuming you spend a total of 2-3 hours in a day in the kitchen)
COOKING TIME: 10 Minutes
INGREDIENTS:
1/2 tablespoon oil
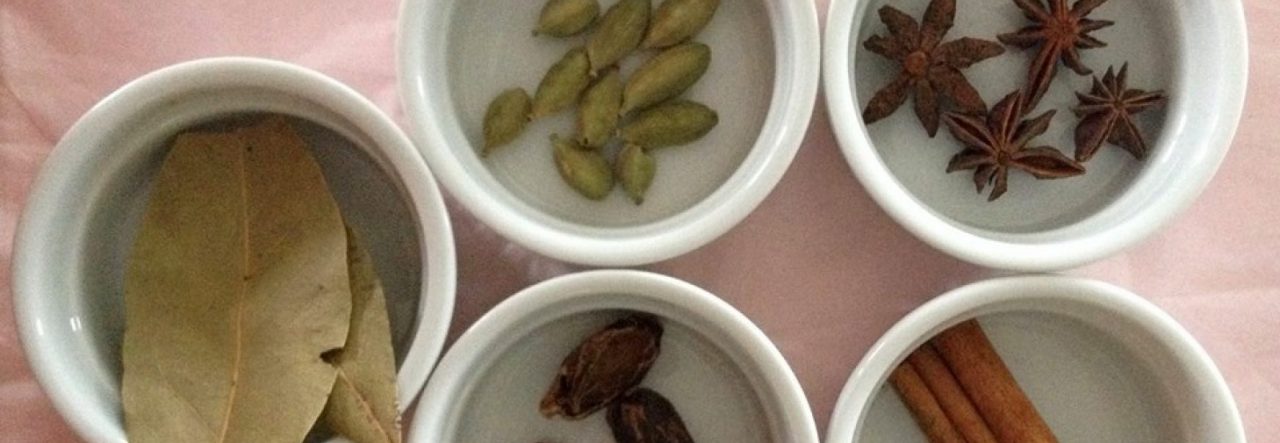
1 cinnamon stick (dal chini)
1 star anise (chakraphool)
1 big cardamom (elaichi)
2 bay leaf (tez patta)
1 bunch of mustard (sarson) / rapini leaves (half kilo) or Broccoli florets
10 frozen spinach (palak) pellets (100 grams)
3 frozen fenugreek (methi leaves) pellets (100 grams) or 50 grams of dried fenugreek (methi) leaves
1 large onion – chopped any size
1 large tomato -chopped any size
1 inch frozen crushed green chilli
2 inch frozen garlic or 4 crushed cloves
2 inch frozen ginger or 50 grams freshly grated ginger
1 tea spoon salt
2 teaspoons red chilli powder
2 tablespoons coriander powder
1.5 teaspoons all spice (garam masala)
Butter dollop or butter oil (ghee) for topping (optional).
STEP 1. Put cinnamon stick (dal chini), star anise (chakraphool), big cardamom (eliachi) and bay leaf (tez patta) into heated oil, let them get brown
STEP 2. Add rest of the ingredients except all spice (garam masala) and cook for 2 whistles in cooker or until everything is tender in a pan (about 10-15 minutes).
STEP 3. Remove whole spices and run the hand grinder for 1 to 2 minutes right into the cooker/pan to make it smooth. You can then put the whole spices back in.
Step 4. Add garam masala and let it simmer for 5 minutes until you see that water has evaporated. Add butter or ghee, if desired.
HANDY TIPS:
As very little oil is used to prepare this recipe, you can add a dollop of butter or butter oil (ghee) when serving.
You can replace the mustard leaves with fresh or frozen broccoli florets or rapini if the mustard leaves are not available. It will give close to the same original sarson saag (Mustard) taste.
The attractive and exotic looking olive oil bottles with flavoured dressing and cooking oils that we are ready to pay big bucks can be prepared at home. When you fill up your olive oil bottle simply add some dry whole spices like a cinnamon stick, bay leaf, whole red chilli, or fresh herbs like rosemary or dill. The oil starts to pick up the flavour of the spices in 3 to 4 days.
– With ready grilled/sautéed/roasted chicken tikka
SERVES: 3-4
GLUTEN FREE- LOADED WITH PROTEINS -QUICK TO MAKE
Why this recipe? How is it green and quick? How am I contributing to making this earth green by following this four steps or less recipe?
Using Pressure Cooker will take 5-7- minutes whereas it will take 15-20 minutes in a regular pan. Using frozen chopped garlic and ginger will save 5-10 minutes of your time.
By using this recipe you save: 50% of fuel energy and 15-20 minutes of your precious time that is about 8 to 15% of the total time you spend in kitchen on an average (assuming you spend a total of 2-3 hours in a day in the kitchen)
Allows you to be creative. For vegetarian option, you can choose to add cottage cheese, baby potatoes or veggies to substitute chicken.
COOKING TIME: 15-20 minutes
INGREDIENTS:
2 tablespoons oil
1 cinnamon stick (small)
1 star anise
2 green cardamom
5 pieces of cloves
5 medium tomatoes (pureed)
1 inch frozen garlic or 2 fresh crushed cloves
2 inch frozen ginger or 25 grams fresh grated ginger
1 teaspoon red chilli powder
1 teaspoon salt
½ teaspoon sugar
20 cashews or almonds (powdered)
200ml full cream milk
½ kilo grilled boneless chicken/chicken tikka
STEP 1. Put cinnamon stick, star anise, green cardamom, and cloves into heated oil until they get brown
STEP 2. Once spices are brown, add crushed tomato/puree, red chilli, ginger, garlic and sugar and cover the pot. Let it simmer for five minutes, then add powdered nuts with half a glass of water and cover the pressure cooker for 4-5 minutes (or if using a pan for 10-12 minutes).
STEP 3. Remove whole spices and run the hand grinder for 2 minutes right into the pan to make gravy smooth.
STEP 4. Add grilled chicken/chicken tikka (ready made or prepared using Four Steps or Less recipe of जला भुना मस्त मुर्गा (CHICKEN TIKKA) and 1/2 cup of milk to curry as it becomes thick. Let if boil for 5 minutes before you serve. If needed, keep adding milk to get the required density.
Handy Tips:
1. The quick option is to use already grilled/roasted chicken tikka (or even raw boneless chicken) to add to the butter chicken curry.
2. If using raw chicken, smear cut chicken pieces with meat masala or curry powder, let it rest for 5 minutes and then add to the curry, let it boil for 15 minutes or until the chicken is tender.
Time is precious, value your time. When in the kitchen preparing a meal, use the same time to do other preparatory things for future use while your food is on the stove getting tender. For example, as I mentioned in a previous post, you could peel and grind ginger and garlic to freeze for future use. Or you could prepare a broth or sauté chopped onions for the next day (as I will explain in an upcoming post). This will save cooking time for your next meal and you get some more time each day to spend with your loved ones!
When you have some free time, peel and chop ginger, garlic and green chillies in a chopper and freeze them in a thin layer in separate freezer bags. Once frozen, break the layer with loose hands to pieces of different sizes. You can throw in a piece of the required ingredient as needed for any recipe while cooking.This will cut short the cooking time substantially. Now spend this saved time with your family or doing what you like to do the most.
A pressure cooker is the only saviour of earth! I am not joking.. the rate at which mankind is currently consuming fuel energy, it is only the pressure cooking that can make a significant difference over time on the carbon footprint that our beloved planet is taking on. One of the main elements of green cooking is using pressure cookers. Pressure cookers not only cook food quickly but also retain the vitamins and minerals that are otherwise lost using other cooking methods.
This slideshow requires JavaScript.
This slideshow requires JavaScript.
Pressure cookers have been in use in most parts of Asia, more so in India and Asia for decades now. Trust me, they are safe. You just need to understand how they work. There can however be a little bit of a learning curve if you’re using a pressure cooker for the first time. It’s important to know how to get started safely. If you know how the basic mechanism works it will be easy for you operate it with ease.
There are a wide variety of pressure cookers available in different shapes and sizes. All work on the same principle. When the pressure cooker is heated by the stove, the heat produces steam which cooks food faster by using the effects of pressure combined with heat.
A pressure cooker consists of the main pan, a lid, a rubber gasket that goes on the lid to seal pressure and a steam release system that includes a whistle and a safety valve. The whistle blows when steam reaches its maximum capacity. This is a way to time the cooking as well as a sign that the pressure cooker is working properly. The cooking time for many of my recipes is measured by the number of whistles that blow!