Featured

The Sindhi Karhi

GLUTEN FREE
I usually make this karhi when I have varied veggies in small quantities in my fridge that I want to finish off: and also when I have lots of guests to entertain and I need to make something easy and delicious but in large quantities. A variety of vegetables in this recipe adds to the quantity and also makes it more flavourful.
IMG_6522

SERVES: 6-8

Why this recipe? How is it green? How am I contributing to making this earth green by following four steps or less recipes?

In an effort to continue to promote use of energy and time saving tools and gadgets, using pressure cooker for this recipe will take about 5 minutes to make the vegetables tender whereas it will take 20-30 minutes in a regular pan. The conventional recipe requires vegetables to be fried to make them tender and then put in the karhi. This alternative will have high trans fat content, 

You save: 70% to 80% of fuel energy and 15 to 20 minutes of your precious time that is about 10 to 15% of the total time you spend in the kitchen on an average(assuming you spend a total of 2-3 hours in a day in the kitchen).

COOKING TIME- 20-25 minutes
INGREDIENTS:
2 Tablespoon besan (chickpea flour)
1 Litre water
1 Tablespoon cooking oil
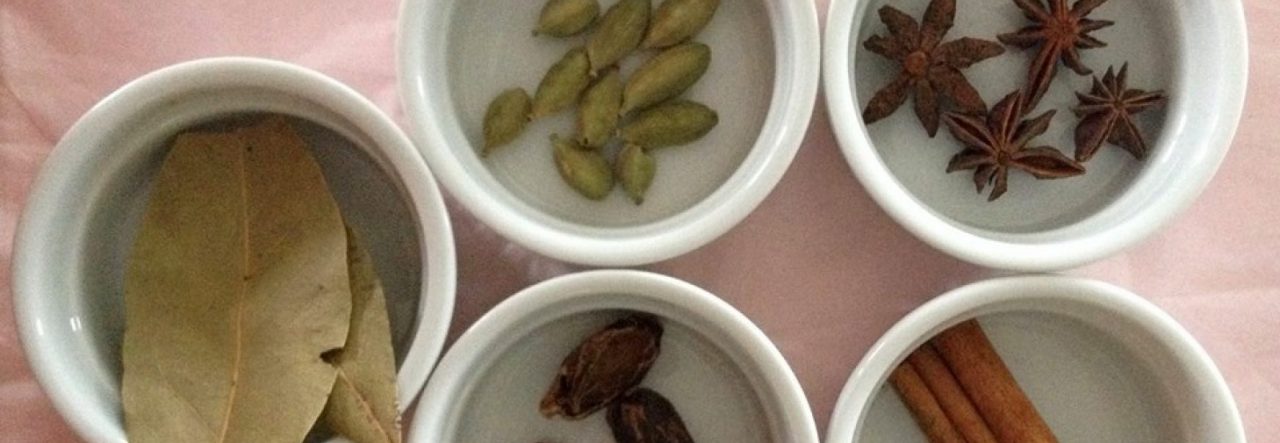
2 Teaspoons fenugreek seeds (Methi seeds)
2 Teaspoons cumin seeds (Jeera)
4 Whole dried red chillies (i like using rounds more than the long ones)
1 Tablespoon turmeric powder (Haldi)
1/2 Tablespoon red chilli powder
50 gms of tamarind pulp (without seeds) after soaking in water
1 Kilo assorted vegetables cut into 2 inch dices (I use all veggies that are available in my fridge like Okra (bhindi), egg plant, zucchini, beans, any kind of guard, cauliflower, lotus stem, potatoes, broccoli, carrots).
Salt to taste ( approximately 4 teaspoons)
STEPS
1. Heat oil in the pressure cooker, add fenugreek seeds, cumin seeds and whole red chillies, once flavour is released, add chickpea flour and sauté it for 2-3 minutes
2. Add water, cut vegetables, turmeric powder, red chilli powder and salt. Close the lid of the pressure cooker and let it get one whistle or 5 minutes until pressure is built in the cooker. (just enough to get the vegetables tender, this is to save time)
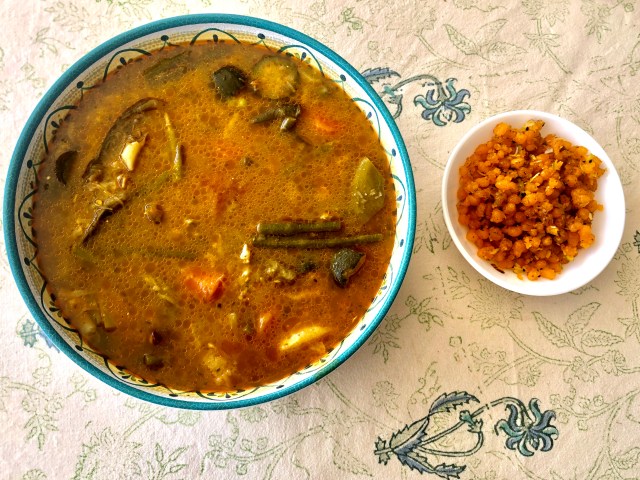
3. Open the lid after the pressure is released, add tamarind pulp and let the karhi boil for 10-12 minutes .. And it is ready…
HANDY TIPS:
1. Keep the karhi on low heat even when it is being served.. The more it boils, more flavours are released of different vegetables, it continues to get more delicious.
2. Sindhi Karhi typically is served first as a stew or soup, and in the main meal with rice and sweet boondi (chickpea flour droplets fried and then dipped in sugar syrup, see picture above)
Advertisement
Featured

No hassle-No sugar-Easiest Gajar Halwa

GLUTEN FREE- SUGAR FREE

Why this recipe? How is it green? How am I contributing to making this earth green by following four steps or less recipes?

Easy to make, gluten free and sugar free classic indian dessert made in less than half the time of usual conventional recipe. Saving time and energy thereby reducing the carbon footprint on our precious planet. 


gajar halwa 1
SERVES- 6
COOKING TIME- 30-45 minutes
 
INGREDIENTS:
1 kilogram carrots grated
1 litre fresh Milk (full cream optional)
½ tablespoon Ghee
2 green cardamoms
10-15 pitted dates(about 100 grams) cut in small pieces
15-20 almonds cut in slices (about 25 grams) (optional)
15-20 cashews halves (about 25 grans) (optional)
20-25 raisins (about 25 grams) (optional)
10 strands of saffron beaten on a cutting board or pastel (optional)
 
STEPS
1. Put ghee in the pan and add cardamoms after cracking them open so that the flavour is released.
2. After a minute or so add grated carrots and sauté them for 3-5 minutes until the colour changes to little dark (excess moisture will evaporate during this process).
3. Add milk and place the heat on low after the milk starts to boil. Let it simmer for 20-25 minutes. Keep stirring at intervals of 3-4 minutes. You will notice carrots cooking, absorbing milk, becoming more tender and getting cooked in milk.
4. Add cut dates , saffron and nuts and let it cook for another 10-12 minutes until all milk is absorbed and the milk dries out.. surface f the pan will greasy now without traces of water/milk…and it is ready to serve..
 
HANDY TIPS:
1. If you leave the heat on low all through the process you don’t need to stir as often.
2. I usually use low fat milk, you could use full cream milk to make it more creamy and rich.
Featured

Quick and Easy – My Tiramisu

SERVES- 3-4
COOKING TIME- 20 minutes

TiramisuINGREDIENTS
2 eggs
100 grams Mascarpone cheese
50 ml brewed coffee
25 ml Irish cream liqueur (optional)
50 grams sugar powder
20-25 lady finger Italian biscuits (or left over bread or cake)
50 grams whipped cream(optional)
1 teaspoon vanilla essence
1 tablespoon of cocoa powder
1 teaspoon of cinnamon powder

PREPERATION
-Brew coffee and put it in the fridge to cool down
-Keep Mascarpone cheese outside the fridge to bring it to room temperature
-Separate egg yolks from whites and keep whites in the fridge until you need them in the recipe

STEPS
STEP 1. Mix egg yolks and sugar and put it on a double boiler pan. Keep stirring it until it gets a little thick and sugar looks cooked (about 4-5 minutes). Put this in fridge to cool down. You will start making Tiramisu once this is cooled down.
STEP 2. Beat egg whites with electric beater to a point where whites are drip free and form soft peaks. Similarly, beat whipped cream to a point where is becomes thick and soft NOT to make butter, stop just before that.
STEP 3. Fold in egg yolks mixture, egg whites mix, cheese and whipped cream softly.
Step 4. Mix coffee and Irish cream liqueur in a shallow dish, dip the biscuits in a quick motion into this mixture (do not dip them in the liquid too long as the biscuits are very light and may melt away) and layer them in the serving dish. Spread the cream mixture as per step 3 over the dipped layered biscuits, place another layer of coffee dipped biscuits and then another layer of the cream mixture. Sprinkle cocoa powder and cinnamon powder over this using a small sieve.

HANDY TIPS:
1. As a substitute to Italian lady finger biscuits you could use left over bread or cake and dip it well in the coffee and liquor mixture before spreading the eggs and cream mixture. It comes out quite close to the original taste.
2. You can avoid putting whipped cream if you are counting on calories. I have skipped it quite a few times and it has come out well.
3. I also use reduced amount of sugar and cheese at times.
4. You could also sprinkle nutmeg powder as per you taste buds.
5. Irish cream liquor can be substituted with any other liqueur like Amarula, Baileys or other cocoa /coffee based liqueurs.

Featured

Easiest Homemade Dhokla

SERVES: 4

GLUTEN FREE

Why this recipe? How is it green? How am I contributing to making this earth green by following four steps or less recipes?

Quick to make, great to store, quick to steam in a pressure cooker or in microwave. 

Dhokla is chickpea flour steamed savoury cake. It is one of the most healthy snacks to have at a time when you carve for something savoury but do not want to have some off the shelf that has pastry flour or shortening in abundance.

COOKING TIME- 5-10 minutes

INGREDIENTS:
2 tablespoon oil
100 grams Besan (chickpea flour)
½ cup yogurt
150 ml water
1/2 teaspoon turmeric powder (optional)
1 teaspoon salt
1 inch frozen or fresh grated ginger
2 teaspoon of sugar
3-4 figs of fresh coriander or parsley
1 tablespoon mustard seeds(for garnish)
2-3 green chillies

You will need a regular vegetable steamer or a microwaveable dish that you can use steam the dhokla.

dhoklaSTEPS
1. Mix oil, yogurt, 50 ml of water, chickpea flour, turmeric powder and salt in a mixing bowl and leave it for 10-15 minutes.
2. This mixture has to be steamed for 8-10 minutes in a regular steamer or 5 minutes in microwave. Just before pouring the mixture in the steamer mould, add antacid powder to the mixture and stir it for a minute, you will see it will start coming up because of the soda in antacid powder.
3. While the steaming is on, take a separate small pan and add 1 teaspoon of oil, mustard seeds and split whole green chillies, once splattering starts, add 100 ml of water and sugar to it. Let it cook for 2 minutes.
4. Let the steamed dhokla cake cool down for 5-10 minutes and then pour this sweetened water mixture on it before you cut it into pieces to serve. Sprinkle fresh coriander or parsley before serving.

HANDY TIPS:
1. Dhokla goes very well with spicy hot and sweet chutneys and home made dips.
2. This snack is considered one of the most healthy and nutritive ones as it is steamed.

Homemade gluten free Dhokla

SERVES: 4

GLUTEN FREE

Why this recipe? How is it green? How am I contributing to making this earth green by following four steps or less recipes?

Quick to make, great to store, steam in a pressure cooker, pan or in microwave. 

Dhokla is chickpea flour steamed savoury cake. It is one of the most healthy snacks to have at a time when you carve for something savoury but do not want to have some off the shelf thing that usually has pastry flour or shortening in abundance.IMG_2844

Dhokla is readily available in local India market and indian sweet shops in North America. However, it may not be completely gluten free as semolina is a common ingredient for Dhokla. This recipe however is gluten free. I have been making Dhokla using readymade mix for sometime but now, in my zeal to avoid all preservatives and emulsifiers, I have tried this recipe many times and now have got it perfect. The dhokla comes out really soft and spongy. I have been making it more in the microwave than the conventional steaming in a pan or cooker.

INGREDIENTS:

For Dhokla
1 cup chickpea flour
1/4 cup olive oil or cooking oil
1 teaspoon yogurt
½ cup water
1 teaspoon fruit salt or ( mix of 1 teaspoon baking powder and 1/4 teaspoon baking soda)
1/4 teaspoon turmeric powder
1 tablespoon lemon juice
½ teaspoon salt
2 inch frozen or 25 grams fresh grated ginger

For Dhokla Garnish
1 teaspoon oil
½ tablespoon mustard seeds
1 tablespoon sugar
2 hot green chillies cut in thin long slices
½ cup water

STEPS:
STEP 1
. Mix all ingredients except fruit salt (baking soda/baking powder) making sure there are no lumps.  The mixture should not be too runny, it should be something like that for crepes or pancakes. Add more water if needed.
STEP 2. Let it rest for 5 minutes while you prepare the steamer with enough water and grease the dhokla container with oil.
STEP 3. Mix fruit salt into the mixture, you will see it rising as you mix it, stir for a minute and pour it into steaming dish. Steam it for 4-5 minutes in microwave or 15-20 minutes on stove steamer or pressure cooker without whistle.
STEP 4. Remove from steamer and let it cool down for 10-15 minutes before removing from the container.

STEPS for Dhokla Garnish: 
STEP 1
. Put oil in a very small pan and add mustard seeds to it.
STEP 2. As they start to splutter (will be in few seconds) add green chillies, water and sugar slowly and carefully. Let it boil for 2 minutes.
STEP 3. Cut Dhokla into even sized square pieces.
STEP 4. Pour mixture evenly on prepared dhokla.

HANDY TIPS:
1. For microwave steaming, if you do not have a dhokla stand ( that has a water tray, a flat container and a cover), just use any container/tray to fill water, keep a small bowl upside down in the water tray to raise the level at which dhokla mix container will be put. Cover the tray and container with microwave lid so that steam remain between the tray and dhokla container.
2. Put some fresh coriander or parsley leaves to garnish before serving.

Overnight healthy yogurt oats


SERVES: 1

Why this recipe? 

GLUTEN FREE

This is quick to make, needs no special ingredient, is healthy and requires no cooking or heating. You can store it in refrigerator and have it for breakfast, snack or dessert. You can make it in bulk and store to save time for the next time you have a craving for something sweet yet healthy.

PREPARATION TIME6F28846A-A37F-42B7-BAE2-8D0388ADC26D
5-10 minutes
Refrigeration time : 3-4 hours

INGREDIENTS
2 tablespoon oats
1 tablespoon low fat yogurt
1 ripe peach or 2 strawberries
half handful of pecans/walnut/sliced almonds
1 teaspoon maple syrup or honey
1 passion fruit (pulp)-optional

3A12B43F-8228-4AF2-998E-82382B81E748STEPS
STEP 1. Blend fruits, yogurt and maple syrup/honey in blender.
STEP 2. Pour this mixture and nuts on top of oats in the container and mix well.
STEP 3. Leave it for a minimum 3-4 hours or overnight in the refrigerator.
STEP 4. Add passion fruit pulp on top before eating/serving.

HANDY TIPS:
1. Add milk to make the mix more liquid or to replace yogurt with milk as per your liking.
2. You can make this with any fruit like banana, berries, mango or apple.
3. Be creative, add cocoa powder, other nuts to your liking, replace maple syrup with jam or sugar or garnish with a layer of nutella instead of or under passion fruit pulp. (passion fruit gives it a crunchy feel)


Tandoori Naan in Toaster

thumb_img_3032_1024 SERVES: 3-4

Quick Light Fresh Baked Bread

COOKING TIME: 5-7 minutes

INGREDIENTS: 
400 grams all purpose flour
400 ml plain yogurt
5-10 drops of oil

STEPS:
thumb_img_3033_1024STEP 1.  Add yogurt to the flour, make dough soft enough that is not sticking to your hands. Take oil on your hand and roll the dough with greased palm to finish. Wrap the dough in wet cloth napkin (water squeezed). Rest the dough for at least 30 minutes before rolling into naan.
STEP 2.  Make balls of dough for the size and thickness that you want the naan to be. Roll the balls with pastry roller to make naan.
STEP 3.  Place rolled naan on to heated non-stick pan, turn it around when you see brown dots on one side.
thumb_img_3031_1024Step 4.  Once both sides of the roti have been on the heated pan once, move the naan into the toaster on high setting. Fluffed and crisp tandoori naan will pop out of the toaster.

HANDY TIPS:
1. Keep rolling the dough balls into naan while one is cooking on the pan so that next one is ready as soon as you move the first one into the toaster.
2. Usually a tennis ball size of roll would make a 6-8 inch diameter naan.
3. Due to elasticity of all purpose flour the dough may not be able to be rolled in round shaped naan, they usually come out oblong shaped. This shape fits well into toaster slots.
4. Depending on the size of the slot of your toaster you may want to cut the naan in half before sliding it into the toaster so that all of it bakes well.


Tandoori Roti in Toaster

SERVES: 3-4

Quick Light Fresh Baked Bread

COOKING TIME: 5-7 minutes

INGREDIENTS: 
400 grams whole wheat flour
200 ml water
5-10 drops of oil

STEPS:
STEP 1.  Add water to the flour, make dough soft enough that is not sticking to your hands. Take oil on your hand and roll the dough with greased palm to finish. Rest the dough for at least 15-20 minutes before making roti.
STEP 2.  Make balls of dough for the size and thickness that you want the roti to be. Roll the balls to make roti.
STEP 3.  Place rolled roti on to heated non-stick pan, turn it around when you see brown dots on one side.
Step 4.  Once both sides of the roti have been on the heated pan once, move the roti into the toaster on high setting. Fluffed and crisp tandoori roti will pop out of the toaster.

HANDY TIPS:
1. Add water cautiously to the flour not to make dough too soft. Dough should be hard enough to easily roll the ball with a rolling pin. You can add more dry flour to the dough or give the balls a pat of dry flour on either side before and during rolling it.
2.Keep rolling the dough balls into Roti while one is cooking on the pan so that next one is ready as soon as you move the first one into the toaster.
3.Depending on the size of the the slot of your toaster you may want to cut the roti in half before sliding it into the toaster so that all of it bakes well.

Save Time for the Next Time-एक सलाह वक़्त बचाने वाली


Here is a tip to get the quick cooking going and to save time on the days you are really pressed for it and yet want to make something nice and elaborate. Most sumptuous indian curries and dishes require sautéed onion and this is what takes time. So, be smart and keep some chopped sautéed onions in your refrigerator. The day you are making a recipe with onions, plan on peeling and chopping some extra onions to save them for the next time. You can also do this on a weekend or at a time when you are anyway in the kitchen cooking something else and have your hands free in between to peel the onions and drop them in a chopper. Sauté all onions together for your current recipe as well as for the next one. Save sautéed onion in small freezer bags/containers for the next time for quick use. This has been a trick that has saved me time on many occasions. For some my upcoming recipes I will be using ready sautéed onions from my fridge. It’s all about saving time, the most precious thing..efficient use of time in the kitchen this time around will save some time for the next time you are in the kitchen.

thumb_IMG_0290_1024